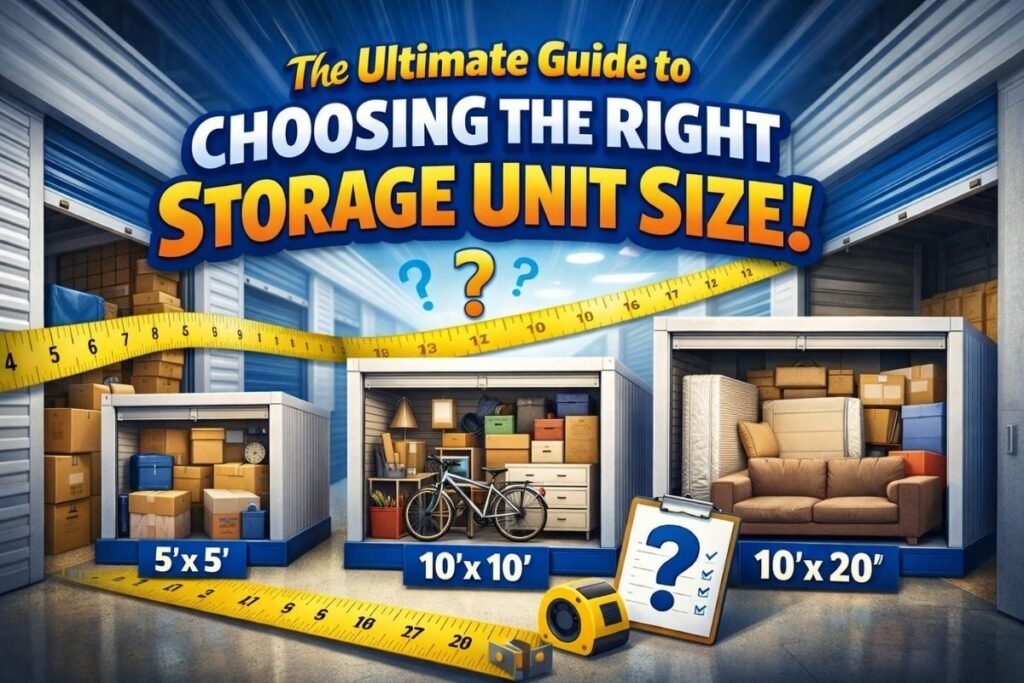
Storage Unit Size Guide: How to Pick the Perfect Space in 2026
Have you ever tried to pack a suitcase for a long trip and realized halfway through that nothing is going to fit? It’s frustrating! Choosing a storage unit is a lot like that, but with much bigger consequences.
Most people fall into one of two traps. Some people rent a unit that is way too big. They end up paying every month for a bunch of empty air, which is basically like throwing money in the trash. Other people try to save money by renting the smallest unit possible. They end up cramming their couch against their TV and stacking heavy boxes on top of fragile mirrors. By the time they open the door again, half of their stuff is broken.
It’s the “Goldilocks” problem: you don’t want a unit that’s too big or too small—you want the one that’s just right.
The Goal of This Guide My goal is to make sure you don’t overpay or break your favorite things. In this guide, we’re going to show you how to:
- Make a quick list of what you actually have.
- Understand what those confusing numbers (like 5×10 or 10×20) actually look like in real life.
- Visualize your stuff inside the unit before you ever spend a dime.
The Secret Pro-Tip: Think Vertically! Before we dive in, here is the #1 secret to saving money on storage: Stop looking at the floor. Most self-storage units are about 8 feet tall. If you only put things on the floor, you’re wasting half the room you paid for. If you learn to stack things safely toward the ceiling, you can often fit everything into a smaller (and cheaper!) unit.
Ready to find your perfect fit? Let’s get started.
Phase 1: The Inventory Audit (The “How Much Stuff Do I Actually Have?” Part)
Before you start calling storage facilities, you need to do a little detective work at home. If you just “guess” how much stuff you have, you’ll almost always guess wrong. Taking twenty minutes to do an inventory audit will save you hours of moving headaches later.
Think of this like making a grocery list before you go to the store. It keeps you focused and prevents you from buying (or renting) things you don’t need.
Categorize Your Items
The easiest way to do this is to walk through your home room by room. Don’t just look at the big stuff! Grab a notebook or your phone and group things into these three categories:
- The Big Guys (Furniture & Appliances): This includes beds, sofas, your fridge, and that bulky treadmill you swore you’d use every day.
- The Stackables (Boxes): These are the easy ones. Books, clothes, and kitchen gadgets usually go into standard boxes that can sit on top of each other.
- The Oddballs: Things like bicycles, floor lamps, or garden rakes that don’t fit in boxes and take up weird amounts of space.
The Box Count: How Many Do You Really Need?
Estimating boxes is where most people get stuck. Here is a simple rule of thumb: for a typical bedroom, you’ll probably have about 10 to 15 medium-sized boxes.
If you’re packing up a whole house, try this: imagine your closet. A standard “medium” box is about 1.5 cubic feet. If you have a shelf full of books, that’s probably two boxes. If you have a dresser full of clothes, that’s another three or four. Round up, not down! It’s better to have a little extra room than to have one box left over with nowhere to put it.
Identify the “Non-Stackables”
This is the most important part for protecting your wallet—and your sanity. Some things just can’t handle the pressure. Make a special list of items that cannot have anything placed on top of them.
- Glass-top tables: If you put a heavy box on these, they will shatter.
- Delicate lamps: These are awkward and fragile.
- Electronics: Your flat-screen TV is not a shelf!
- Family heirlooms: Anything brittle or antique.
Why does this matter? Because “non-stackables” take up way more floor space. If you have five fragile items that can’t be stacked, you might need a bigger unit than someone who has twenty boxes they can pile all the way to the ceiling.
Phase 2: Standard Size Breakdown (The “What Fits” Guide)
Now for the fun part! Let’s look at the actual sizes you’ll see when you’re browsing storage websites. It’s hard to imagine what “50 square feet” looks like, so let’s compare these units to rooms you already know.
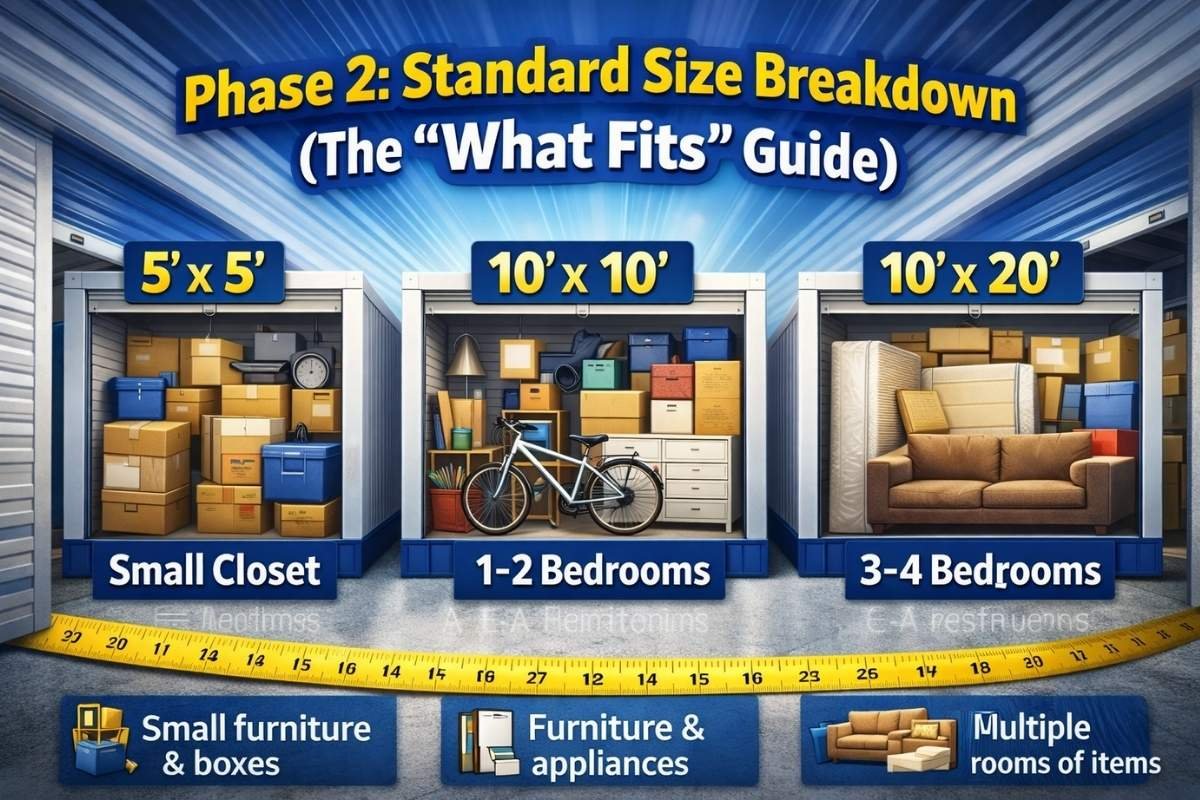
5′ x 5′ (25 sq. ft.): The Hallway Closet
Think of this as a small closet. It’s perfect for the “overflow” in your life. If you’re just trying to clear out a little space in your apartment, this is the one for you.
- Best for: About 10–15 medium boxes, seasonal gear (like Christmas trees or skis), or a small desk and chair.
5′ x 10′ (50 sq. ft.): The Walk-in Closet
This unit is about the size of a large walk-in closet. It’s twice as big as the 5×5, so it can handle much larger items that won’t fit in a hallway.
- Best for: A studio apartment or one bedroom’s worth of furniture. You can fit a queen-sized bed, a dresser, and several boxes in here.
10′ x 10′ (100 sq. ft.): The Half-Garage
This is one of the most popular sizes because it’s basically half of a standard one-car garage. It’s a great “middle ground” size.
- Best for: A 1–2 bedroom apartment. This is where you can start fitting the big stuff, like a fridge, a washer and dryer, and a couple of large sofas.
10′ x 15′ (150 sq. ft.): The Large Bedroom
Imagine a big master bedroom—that’s what you’re getting here. It’s deep enough to hold long items and wide enough to keep things organized.
- Best for: A small 3-bedroom house or really large furniture sets (like a big dining room table with all the chairs).
10′ x 20′ (200 sq. ft.): The Standard One-Car Garage
This is exactly what it sounds like. If you could fit it in your garage at home, you can fit it in here.
- Best for: A 3–4 bedroom house. It has plenty of room for all your furniture, plus the random stuff from your garage and patio, like lawnmowers and bicycles.
10′ x 30′ (300 sq. ft.): The Extra-Long Garage
This is the “King Kong” of storage units. It’s very long—about the size of a large garage that could fit two cars parked end-to-end.
- Best for: Massive estates, business inventory, or even vehicle storage. If you’re moving a huge house with 5+ bedrooms, this is your best bet.
Phase 3: Special Things to Think About
Choosing a size is a great start, but there are a few “hidden” details that can make or break your storage experience. Before you sign that rental paper, you need to think about the weather, the height of your stuff, and—if you’re storing something with wheels—the width of the door.
Climate Control: Do You Need a “Fancy” Room?
A standard storage unit is like a garage—it gets hot in the summer and cold in the winter. For some things, that’s totally fine. But for other items, extreme temperatures can actually ruin them. This is where Climate Control comes in. It’s like an air conditioner and heater for your stuff.
- Electronics: Heat can fry the insides of your TV or computer.
- Wooden Furniture: Wood expands and shrinks with the weather, which can cause it to crack.
- Vinyl Records: These will warp and melt if they get too hot!
- Leather: Your favorite leather couch can grow mold or get “crunchy” in a humid unit.
The Rule of Thumb: If you wouldn’t feel comfortable sitting in the unit for three hours, don’t put your sensitive items in there!
Don’t Forget to Look Up! (Ceiling Height)
Most people only measure how wide or long their stuff is, but they forget about the height. Most storage units are 8 feet tall.
- Measure your tallest item: If you have a 10-foot ladder or a massive antique wardrobe that doesn’t come apart, it might not fit even in a “large” unit.
- Use that height: Remember our “think vertically” tip? If you have 8 feet of space, you can stack four or five medium boxes on top of each other to save floor space.
Storing Things with Wheels (Vehicles, Boats, and RVs)
If you’re planning to store a car, a boat, or an RV, “square footage” isn’t the only thing that matters. You also have to think about the width.
- Cars: A standard car usually needs a 10′ x 20′ unit.
- Boats and RVs: These are often wider than you think. You need to make sure the door is wide enough for you to back the trailer in without scratching the sides. Always ask the manager for the “door clearance” measurements, not just the room size!
Phase 4: Pro Packing Hacks to Save Space
Once you’ve picked your unit, the real challenge begins: fitting everything inside! If you just throw things in, you’ll run out of room fast. But if you use these “pro hacks,” you can make a small unit feel like a giant one.
Disassemble Everything
Think about a dining table. It takes up a ton of space because of the legs, right? But if you take the legs off, that table becomes a flat piece of wood you can lean against the wall.
- Pro-Tip: Take the frames off beds and the legs off tables.
- Don’t lose the screws! Put all the bolts and screws into a Ziploc bag and tape it directly to the furniture it belongs to. You’ll thank yourself later when you’re putting it back together.
The “Pallet” Method (Let Your Stuff Breathe)
You might think the floor is the safest place for your stuff, but it’s actually better to keep things an inch or two off the ground. Using wooden pallets (those flat wooden platforms) is a game-changer.
- Why? It allows air to flow underneath your boxes. This prevents moisture from getting trapped, which keeps your stuff from smelling musty or getting moldy.
The Center Aisle: The “Secret Hallway”
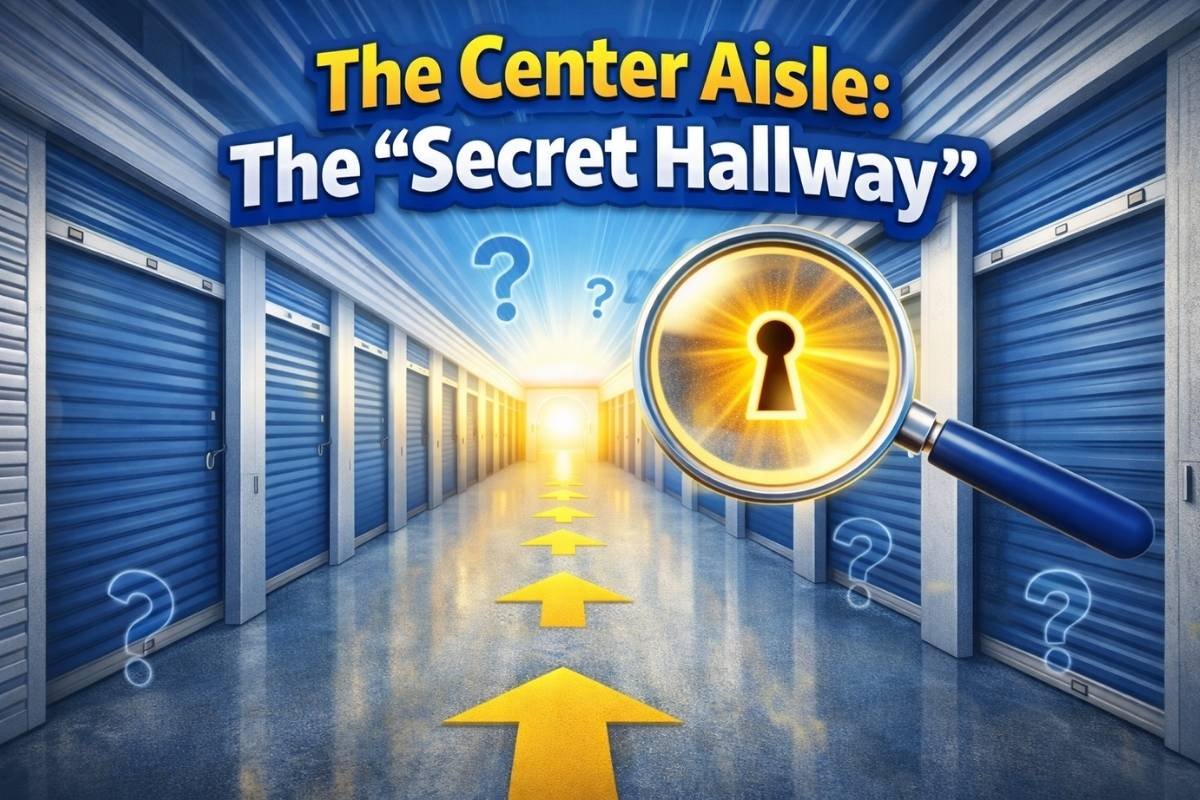
It’s tempting to pack your unit solid from the back wall all the way to the door to use every inch. Don’t do it! If you pack it solid, and then realize you need a box that’s at the very back, you’ll have to move everything out just to get to it. Instead, leave a small “center aisle” or a walkway down the middle. It’s like having a little hallway in your storage room so you can reach everything easily.
Heavy at the Bottom: The Laws of Physics
This sounds like common sense, but you’d be surprised how many people forget it!
- The Foundation: Always put your heaviest boxes (like the ones full of books or tools) on the bottom.
- The Topping: Put the light, fragile stuff (like pillows or clothes) on top.
If you put a heavy box on top of a light one, the bottom box will eventually crush under the weight, and your whole stack will come tumbling down. Keep it bottom-heavy to keep it safe!
6. Summary: Your Quick Storage Checklist
You’ve done the research, you’ve sorted your stuff, and you’re ready to move! Before you sign that lease, keep these points in mind when you’re at the storage facility. It’s the easiest way to make sure you didn’t miss anything important.
The “Before You Rent” Checklist:
- The Inventory: Make sure you have a rough count of how many boxes you actually have.
- The “Tallest Item” Test: Remember to measure your tallest item to make sure it fits under an 8-foot ceiling.
- Climate Needs: Double-check if you have electronics, wood, or leather that need a temperature-controlled room.
- The “Non-Stackables”: Ensure you’ve left enough floor space for things that can’t have boxes piled on top of them.
- Disassembly Tool-Kit: Bring the tools you need to take the legs off tables and frames off beds to save massive amounts of space.
- Path Planning: Pick a unit big enough to leave a small “center aisle” so you can reach the back without moving everything.
Still Unsure? We’re Here to Help!
Choosing a size can be tricky, and we don’t want you to pay for space you don’t need. If you’re still staring at your pile of boxes wondering if they’ll fit:
- Try our [Digital Size Calculator]: Just plug in what you have, and it will do the math for you!
- Come Visit Us: Nothing beats seeing the space in person. Stop by our facility for a quick walkthrough, and our friendly team will help you “eyeball” the perfect unit for your stuff.
Don’t guess—get the perfect fit today!